 |
am2zzw00007756
FRONT DOOR TRIM REMOVAL/INSTALLATION
id091700603500
1. Disconnect the negative battery cable. (See NEGATIVE BATTERY CABLE DISCONNECTION/CONNECTION.)
2. Remove the power window main switch (driver-seat) or the power window subswitch (front passenger-seat). (See POWER WINDOW MAIN SWITCH REMOVAL/INSTALLATION.) (See POWER WINDOW SUBSWITCH REMOVAL/INSTALLATION.)
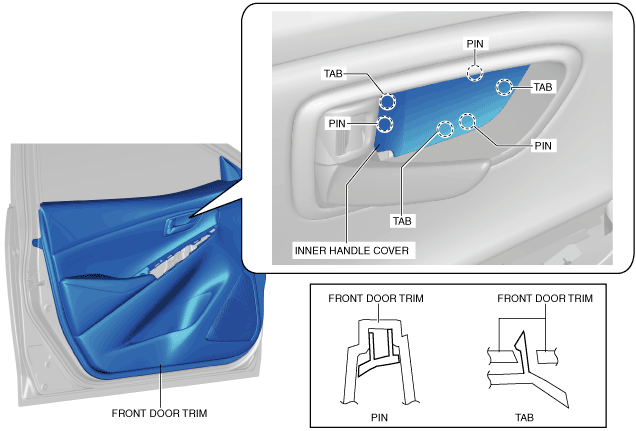
3. Remove the inner handle cover while detach tabs, pins.
am2zzw00007756
|
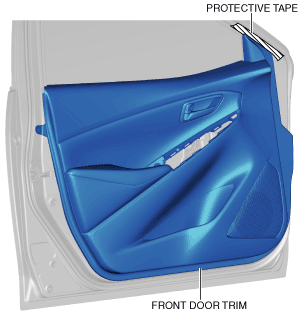
4. Affix protective tape to the shaded position shown in the figure.
am2zzw00007757
|
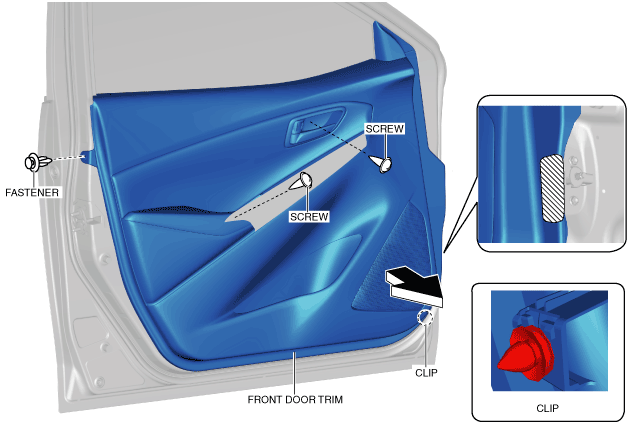
5. Remove the screws.
am2zzw00007758
|
6. Remove the fastener.
7. Hold the shaded area shown in the figure with your hand, pull the front door trim in the direction of the arrow, and detach the clip.
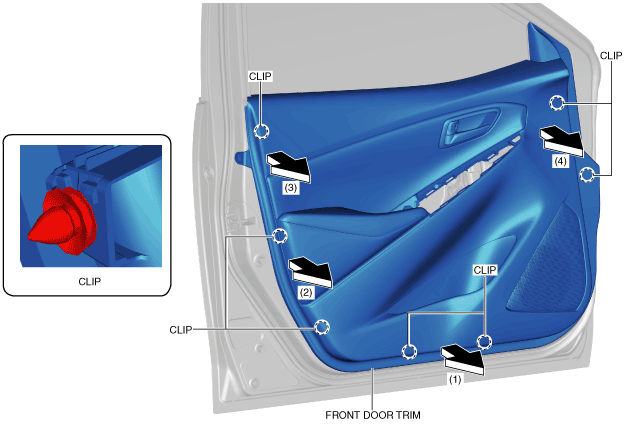
8. Pull the front door trim in the order of arrows (1), (2), (3) and (4) shown in the figure and detach the clips.
am2zzw00007759
|
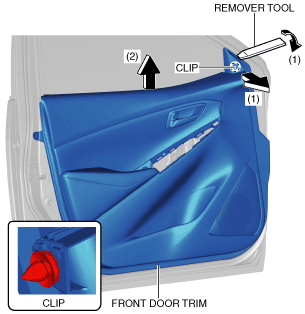
9. Insert the remover tool into the position shown in the figure, move it in the direction of arrow (1), and detach the clip.
am2zzw00008548
|
10. Move the front door trim in the direction of arrow (2) shown in the figure and remove the front door trim.
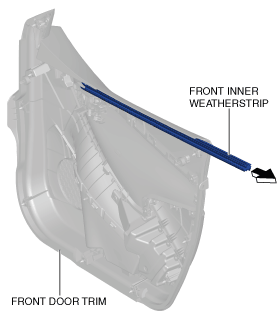
11. Remove the front inner weatherstrip from the front door trim.
am2zzw00007761
|
12. Install in the reverse order of removal. (See Front Inner Weatherstrip Installation Note.)
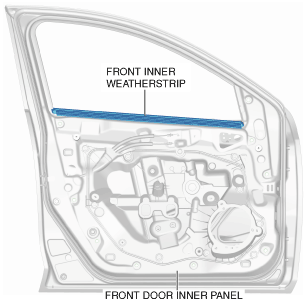
Front Inner Weatherstrip Installation Note
1. Install the front inner weatherstrip to the front door inner panel.
am2zzw00007762
|