 |
am2zzw00007611
PASSENGER-SIDE LOWER PANEL REMOVAL/INSTALLATION
id091700606300
Removal
1. Remove the following parts:
2. Partially peel back the seaming welt.
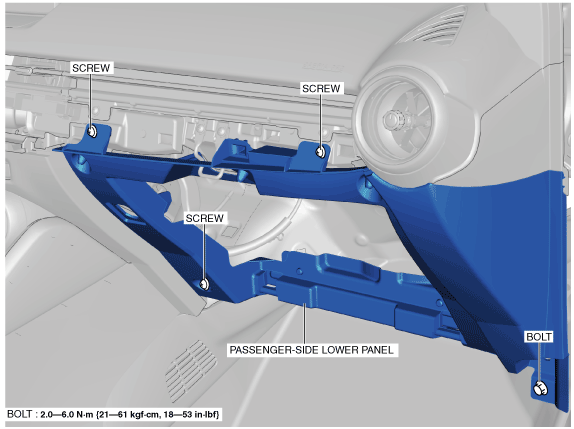
3. Remove the bolt.
am2zzw00007611
|
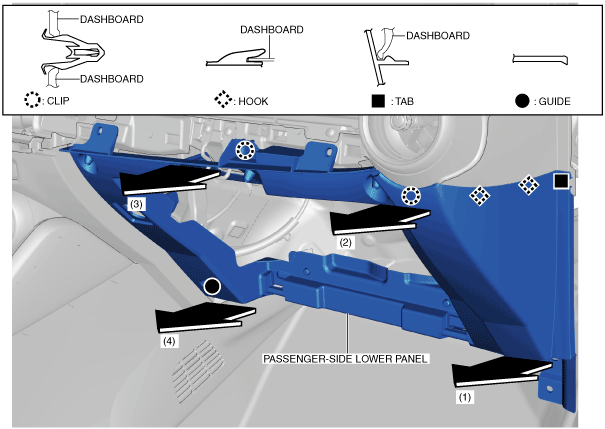
4. Remove the screws.
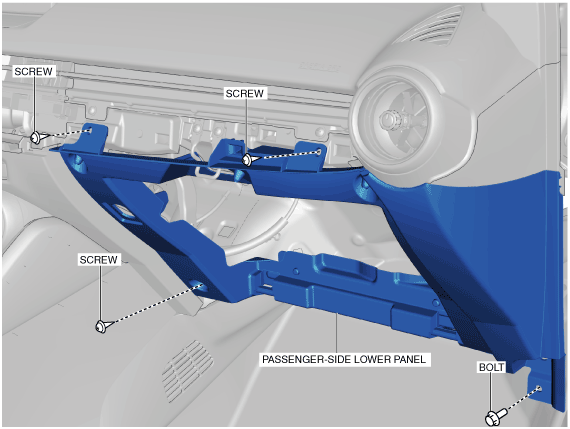
5. Move the passenger-side lower panel in the order of arrows (1), (2), (3), and (4) shown in the figure, and detach the clips, hooks, tab, and guide from the dashboard.
am2zzw00007649
|
Installation
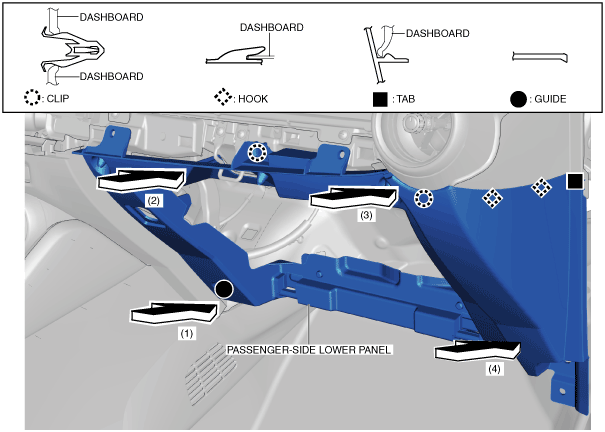
1. Move the passenger-side lower panel in the order of arrows (1), (2), (3), and (4) shown in the figure, and attach the clips, hooks, tab, and guide to the dashboard.
am2zzw00007650
|
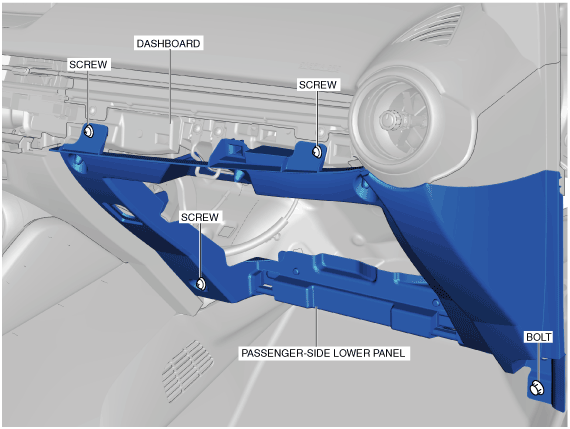
2. Assemble the passenger-side lower panel to the dashboard and tighten the bolt and screws temporarily.
am2zzw00007614
|
3. Install the glove compartment. (See GLOVE COMPARTMENT REMOVAL/INSTALLATION.)
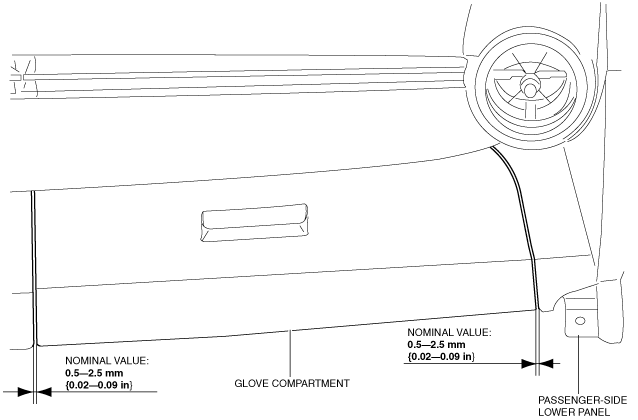
4. Measure the gaps between the glove compartment and the passenger-side lower panel and verify that the measured value is within the standard value.
am2zzw00007643
|
5. Remove the glove compartment. (See GLOVE COMPARTMENT REMOVAL/INSTALLATION.)
6. Tighten the bolt and screws completely.
am2zzw00007616
|
7. Install the following parts: