 |
am2zzw00009032
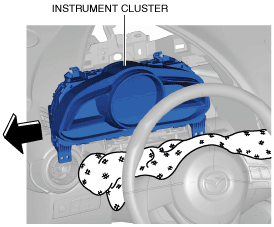
INSTRUMENT CLUSTER REMOVAL/INSTALLATION
id092200010300
Without Active Driving Display
1. When replacing the instrument cluster, perform the configuration. (See INSTRUMENT CLUSTER CONFIGURATION (USING READ/WRITE FUNCTION).)
2. Disconnect the negative battery cable. (See NEGATIVE BATTERY CABLE DISCONNECTION/CONNECTION.)
3. Remove the upper column cover. (See COLUMN COVER REMOVAL/INSTALLATION.)
4. Remove the meter hood. (See METER HOOD REMOVAL/INSTALLATION.)
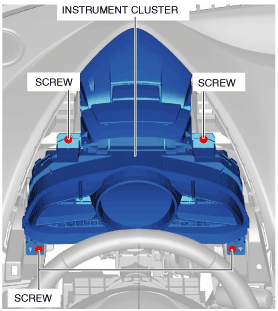
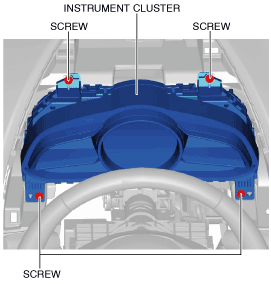
5. Remove the screws.
am2zzw00009032
|
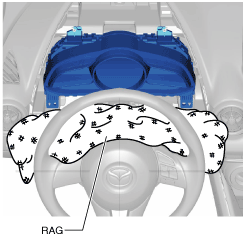
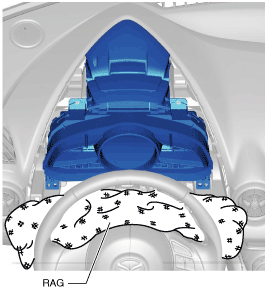
6. Cover the light switch, wiper switch, and start stop unit using a rag to prevent scratches.
am2zzw00009033
|
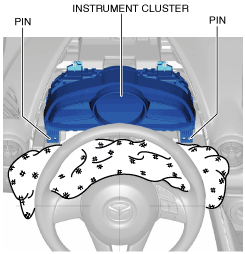
7. Pull the instrument cluster outward to detach it from the dashboard pins.
am2zzw00009034
|
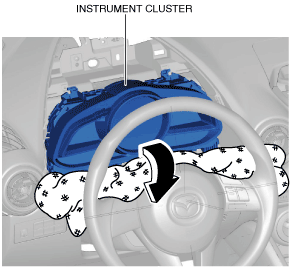
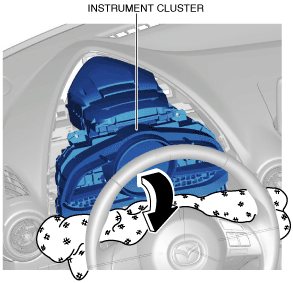
8. Rotate the instrument cluster in the direction of the arrow shown in the figure.
am2zzw00009035
|
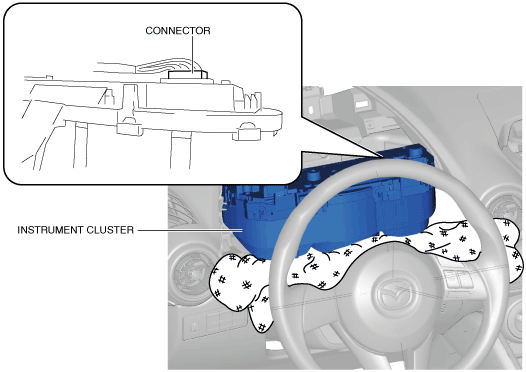
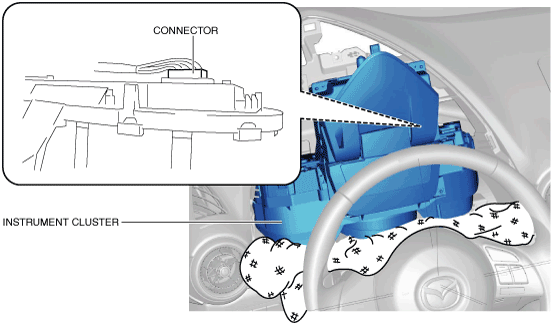
9. Disconnect the connector.
am2zzw00009036
|
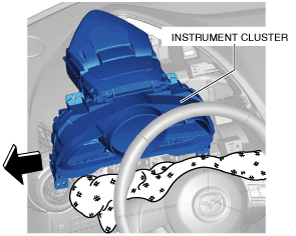
10. Remove the instrument cluster by sliding it between the dashboard and the steering.
am2zzw00009037
|
11. Install in the reverse order of removal.
am2zzw00009038
|
12. After performing the configuration (writing), switch the ignition ON (engine off or on) and verify that the instrument cluster operates normally.
With Active Driving Display
1. When replacing the instrument cluster, perform the configuration. (See INSTRUMENT CLUSTER CONFIGURATION (USING READ/WRITE FUNCTION).)
2. Disconnect the negative battery cable. (See NEGATIVE BATTERY CABLE DISCONNECTION/CONNECTION.)
3. Remove the upper column cover. (See COLUMN COVER REMOVAL/INSTALLATION.)
4. Remove the meter hood. (See METER HOOD REMOVAL/INSTALLATION.)
5. Remove the screws.
am2zzw00009039
|
6. Cover the light switch, wiper switch, and start stop unit using a rag to prevent scratches.
am2zzw00009040
|
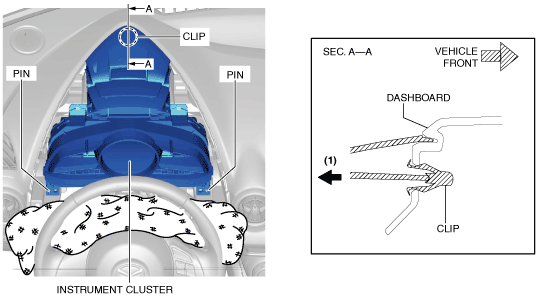
7. Pull the instrument cluster in the direction of arrow (1) shown in the figure and detach the instrument cluster clip from the dashboard.
am2zzw00009041
|
8. Pull the instrument cluster outward to detach it from the dashboard pins.
9. Rotate the instrument cluster in the direction of the arrow shown in the figure.
am2zzw00009042
|
10. Disconnect the connector.
am2zzw00009043
|
11. Remove the instrument cluster by sliding it between the dashboard and the steering.
am2zzw00009044
|
12. When the instrument cluster is replaced, remove the active driving display. (See ACTIVE DRIVING DISPLAY REMOVAL/INSTALLATION.)
13. Install in the reverse order of removal.
am2zzw00009045
|
14. After performing the configuration (writing), switch the ignition ON (engine off or on) and verify that the instrument cluster operates normally.