 |
am2zzw00009680
REFRIGERANT PRESSURE SENSOR REMOVAL/INSTALLATION [MANUAL AIR CONDITIONER]
id0740a2817300
SKYACTIV-G 1.3, SKYACTIV-G 1.5
1. Disconnect the negative battery cable. (See NEGATIVE BATTERY CABLE DISCONNECTION/CONNECTION.)
2. Discharge the refrigerant. (See REFRIGERANT RECOVERY.)(See REFRIGERANT CHARGING.)
3. Disconnect the refrigerant pressure sensor connector.
am2zzw00009680
|
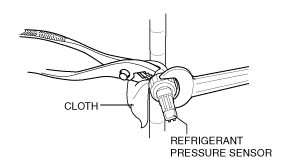
4. Wrap a cloth around the pipe and secure it using pliers.
am2zzw00009681
|
5. Loosen the refrigerant pressure sensor
6. Remove the refrigerant pressure sensor.
am2zzw00009682
|
7. Install in the reverse order of removal. (See Refrigerant pressure sensor installation note.)
8. Perform the refrigerant system performance test. (See REFRIGERANT SYSTEM PERFORMANCE TEST.)
Refrigerant pressure sensor installation note
1. Apply compressor oil to the O-rings and connect the joints.
SKYACTIV-D 1.5
1. Disconnect the negative battery cable. (See NEGATIVE BATTERY CABLE DISCONNECTION/CONNECTION.)
2. Discharge the refrigerant. (See REFRIGERANT RECOVERY.)(See REFRIGERANT CHARGING.)
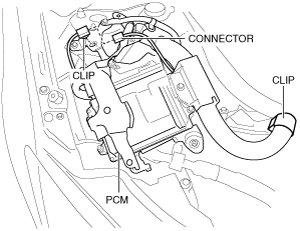
3. Disconnect the connector.
am2zzw00009683
|
4. Remove the clips.
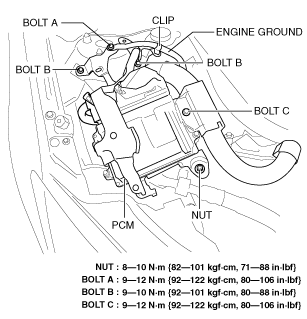
5. Remove bolt A.
am2zzw00009684
|
6. Remove the clip.
7. Disconnect the engine ground.
8. Remove bolt B.
9. Remove the nut.
10. Remove bolt C.
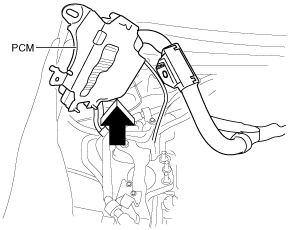
11. Set the PCM out of the way in the direction shown in the figure
am2zzw00009685
|
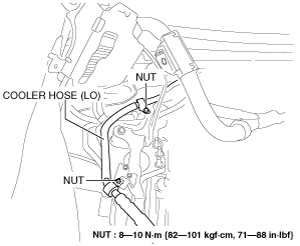
12. Remove the nuts.
am2zzw00009686
|
13. Set the cooler hose (LO) out of the way.
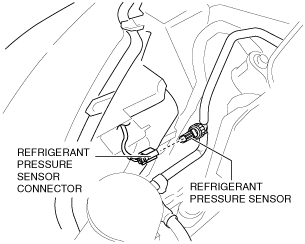
14. Disconnect the refrigerant pressure sensor connector.
am2zzw00009687
|
15. Wrap a cloth around the pipe and secure it using pliers.
am2zzw00009681
|
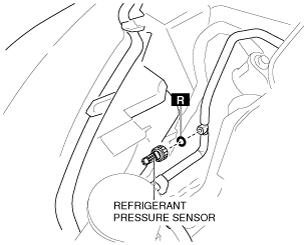
16. Loosen the refrigerant pressure sensor
17. Remove the refrigerant pressure sensor.
am2zzw00009688
|
18. Install in the reverse order of removal. (See Refrigerant pressure sensor installation note.)
19. Perform the refrigerant system performance test. (See REFRIGERANT SYSTEM PERFORMANCE TEST.)
Refrigerant pressure sensor installation note
1. Apply compressor oil to the O-rings and connect the joints.