 |
am2zzw00007676
C-PILLAR TRIM REMOVAL/INSTALLATION
id091700603000
5HB
1. Disconnect the negative battery cable. (See NEGATIVE BATTERY CABLE DISCONNECTION/CONNECTION.)
2. Remove the following parts:
3. Partially peel back the seaming welt.
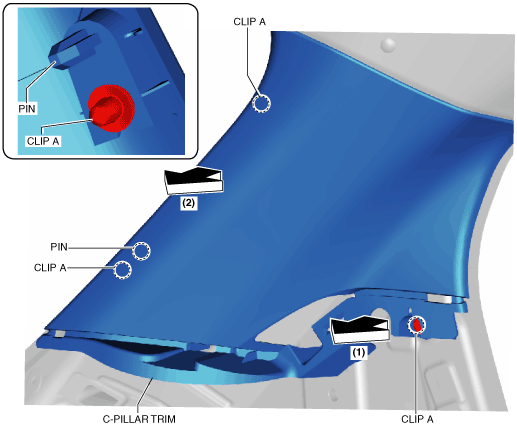
4. Pull the C-pillar trim in the order of arrows (1) and (2) shown in the figure and detach clips A and the pin.
am2zzw00007676
|
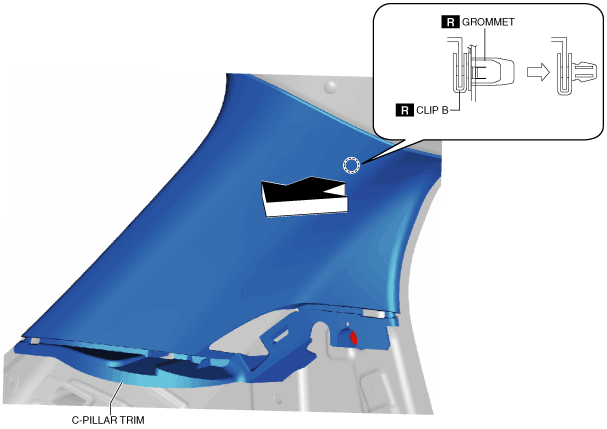
5. Pull the C-pillar trim in the direction of the arrow shown in the figure and detach the clip from the grommet.
am2zzw00007677
|
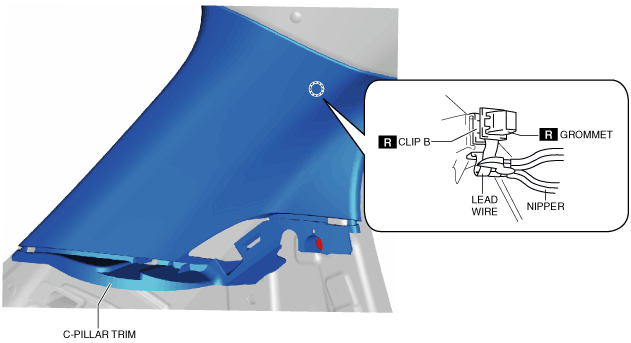
6. Cut the lead wire connecting clips B and grommet using a nipper.
am2zzw00007678
|
7. Pull out the rear seat belt.
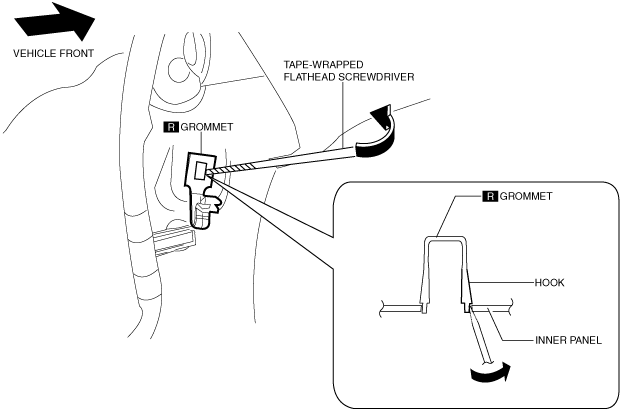
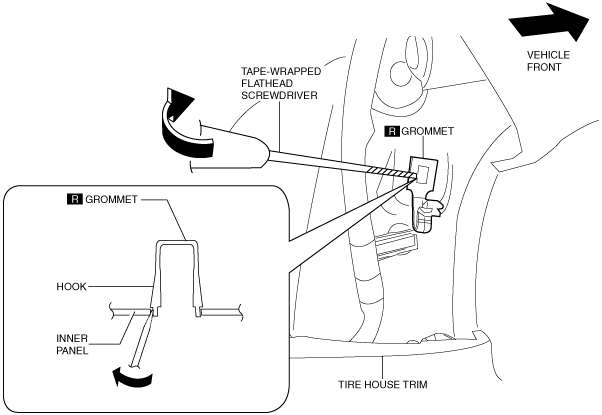
8. Move the hook in the direction of arrow shown in the figure using a tape-wrapped flathead screwdriver and detach it from the inner panel.
am2zzw00007683
|
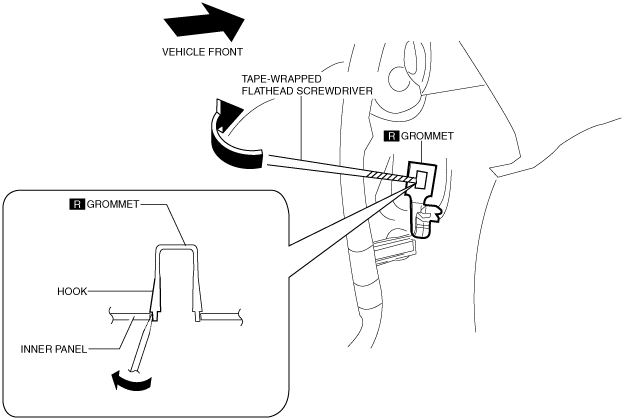
9. Move the hook in the direction of arrow shown in the figure using a tape-wrapped flathead screwdriver and detach it from the inner panel.
am2zzw00008546
|
10. When installing the C-pillar, install new clips B and grommet to the C-pillar trim in advance.
11. Install in the reverse order of removal.
4SD
1. Lower the rear seat back.
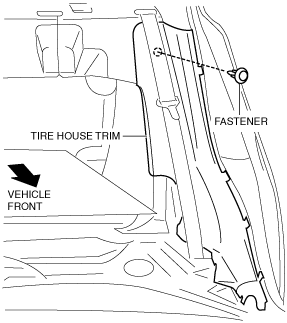
2. Partially peel back the seaming welt.
3. Remove the fastener.
am2zzw00007681
|
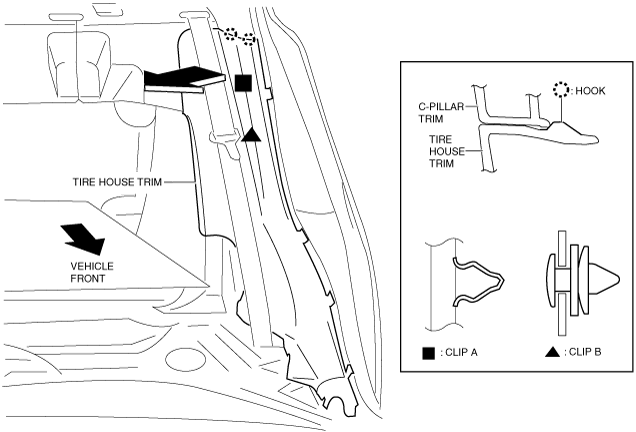
4. Move the tire house trim in the direction of the arrow shown in the figure and peel it back partially until the hooks and clips A and B are detached.
am2zzw00007682
|
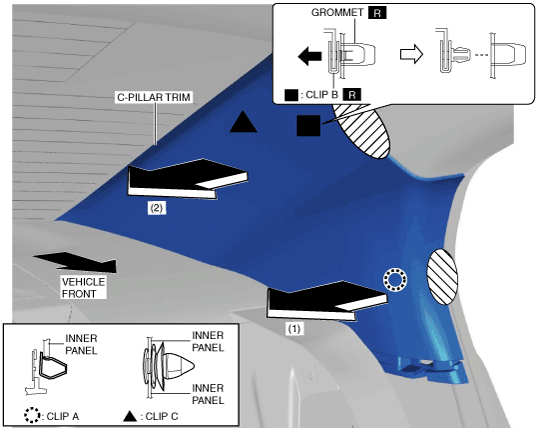
5. Pull the C-pillar trim in the direction of the arrow in the order of (1), (2) while detaching clips A, clip B and clip C.
am2zzw00007457
|
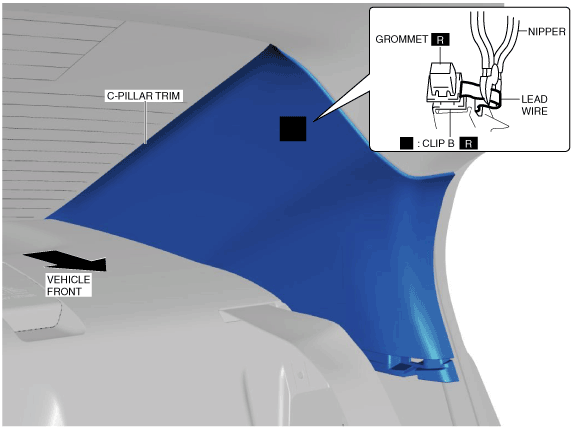
6. Cut the lead wire connecting clips B and grommet using a nipper.
am2zzw00007458
|
7. Remove the C-pillar trim in the direction of the arrow in the order of (1), (2) while detaching guide A, guide B, and guide C.
am2zzw00007459
|
8. Move the hook in the direction of arrow shown in the figure using a tape-wrapped flathead screwdriver and detach it from the inner panel.
am2zzw00007679
|
9. Move the hook in the direction of arrow shown in the figure using a tape-wrapped flathead screwdriver and detach it from the inner panel.
am2zzw00008547
|
10. When installing the C-pillar, install new clips B and grommet to the C-pillar trim in advance.
11. Install in the reverse order of removal.