 |
am2zzw00007781
TRUNK SIDE TRIM REMOVAL/INSTALLATION
id091700604400
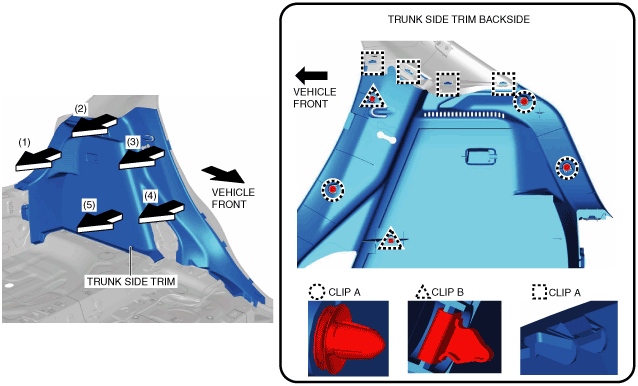
5HB
1. Disconnect the negative battery cable. (See NEGATIVE BATTERY CABLE DISCONNECTION/CONNECTION.)
2. Remove the following parts:
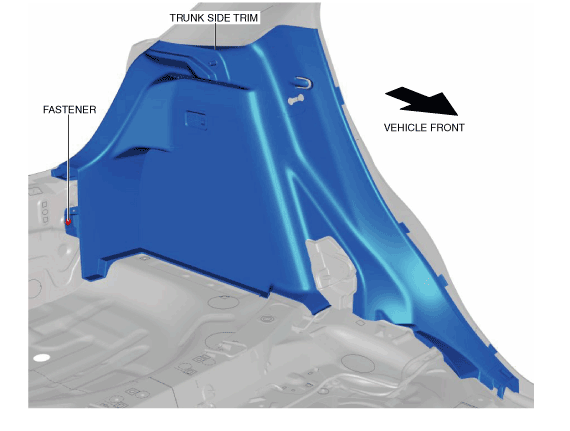
3. Remove the fastener.
am2zzw00007781
|
4. Pull the trunk side trim in the order of the arrows shown in the figure and detach clips A, B, and C from the body or the C-pillar trim.
am2zzw00007782
|
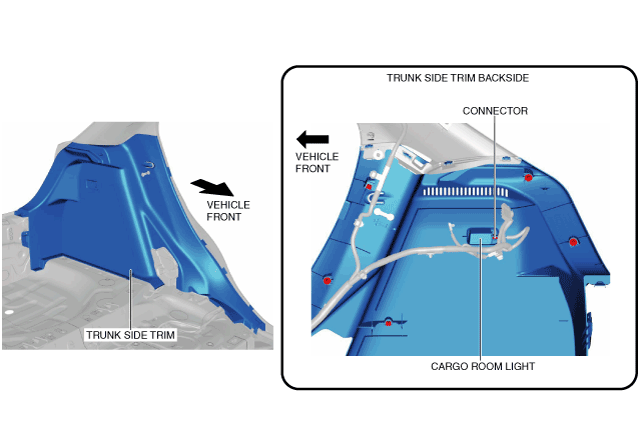
5. Disconnect the connector. (LH only)
am2zzw00007783
|
6. Remove the cargo room light. (LH only) (See CARGO COMPARTMENT LIGHT REMOVAL/INSTALLATION.)
7. Install in the reverse order of removal.
4SD
1. Remove the following parts:
2. Lower the rear seat back.
3. Partially peel back the seaming welt.
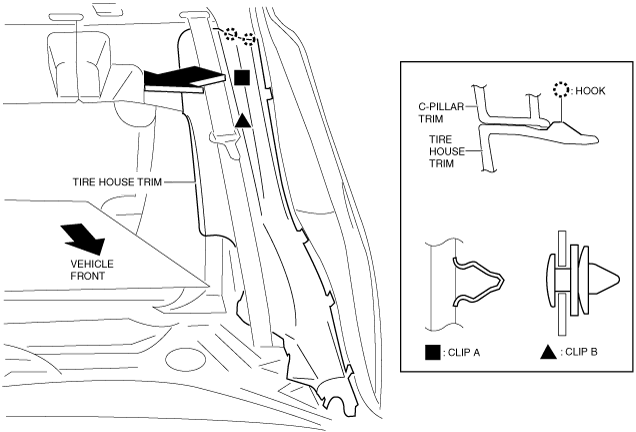
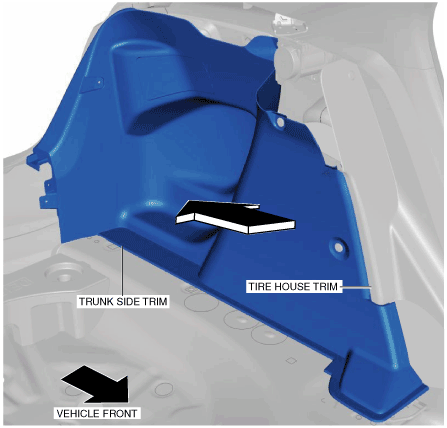
4. Move the tire house trim in the direction of the arrow shown in the figure and peel it back partially until the hooks and clips A and B are detached.
am2zzw00007784
|
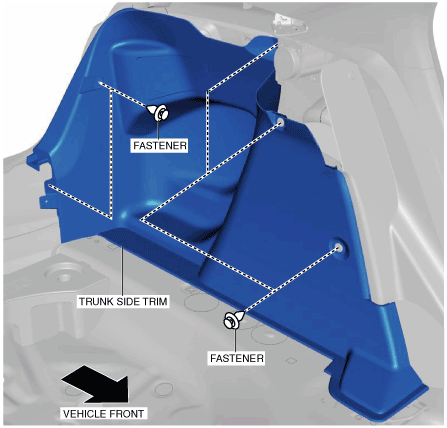
5. Remove the fasteners.
am2zzw00007278
|
6. Move the trunk side trim in the direction of the arrow shown in the figure and remove it while setting the tire house trim aside.
am2zzw00007279
|
7. Install in the reverse order of removal.