|
am2zzw00011656
ANTENNA FEEDER NO.1 INSPECTION
id092000812400
Without Center Display
1. Disconnect the negative battery cable. (See NEGATIVE BATTERY CABLE DISCONNECTION/CONNECTION.)
2. Remove the following parts:
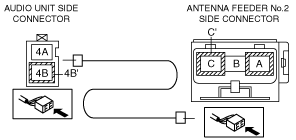
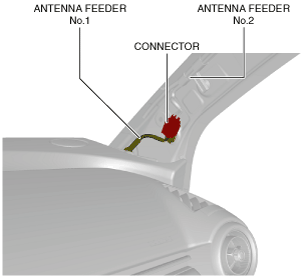
3. Disconnect the connector.
am2zzw00011656
|
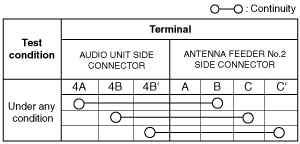
4. Verify that the continuity between antenna feeder No.1 terminals is as indicated in the table.
am2zzw00011657
|
am2zzw00011658
|
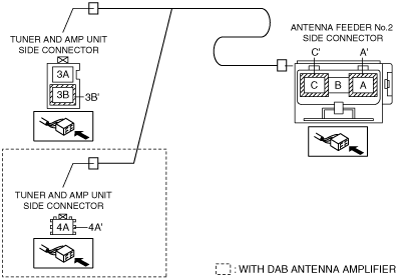
With Center Display
1. Disconnect the negative battery cable. (See NEGATIVE BATTERY CABLE DISCONNECTION/CONNECTION.)
2. Remove the following parts:
3. Disconnect the connector.
am2zzw00011659
|
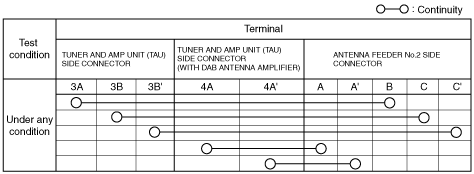
4. Verify that the continuity between antenna feeder No.1 terminals is as indicated in the table.
am2zzw00011660
|
am2zzw00011661
|