 |
am2zzw00011246
ANTENNA FEEDER NO.1 REMOVAL/INSTALLATION
id092000812200
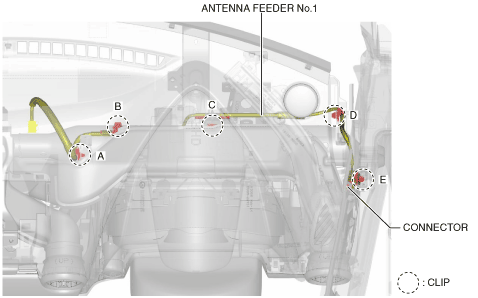
Without Center Display
L.H.D.
1. Disconnect the negative battery cable. (See NEGATIVE BATTERY CABLE DISCONNECTION/CONNECTION.)
2. Remove the following parts:
3. Disconnect the connector.
am2zzw00011246
|
4. Remove clips A, B, C, D, E, and F in the position shown in the figure.
5. Remove antenna feeder No.1.
6. Install in the reverse order of removal.
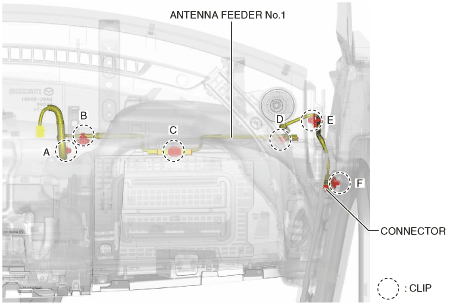
R.H.D.
1. Disconnect the negative battery cable. (See NEGATIVE BATTERY CABLE DISCONNECTION/CONNECTION.)
2. Remove the following parts:
3. Disconnect the connector.
am2zzw00011247
|
4. Remove clips A, B, C, D, and E in the position shown in the figure.
5. Remove antenna feeder No.1.
6. Install in the reverse order of removal.
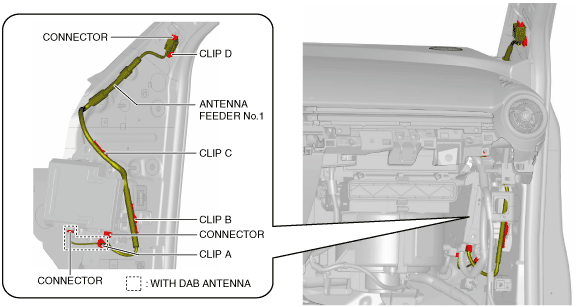
With Center Display
L.H.D.
1. Disconnect the negative battery cable. (See NEGATIVE BATTERY CABLE DISCONNECTION/CONNECTION.)
2. Remove the following parts:
3. Disconnect the connectors.
am2zzw00011248
|
4. Remove clips A, B, C, and D in the position shown in the figure.
5. Remove antenna feeder No.1.
6. Install in the reverse order of removal.
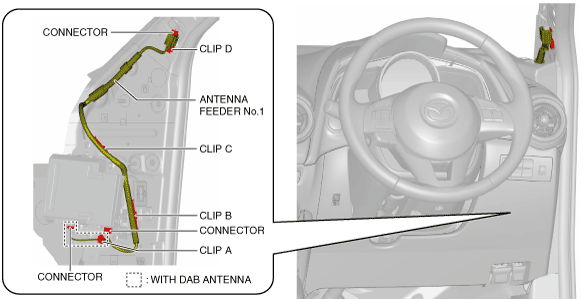
R.H.D.
1. Disconnect the negative battery cable. (See NEGATIVE BATTERY CABLE DISCONNECTION/CONNECTION.)
2. Remove A-pillar trim. (RH) (See A-PILLAR TRIM REMOVAL/INSTALLATION.)
3. Disconnect the connectors.
am2zzw00011249
|
4. Remove clips A, B, C, and D in the position shown in the figure.
5. Remove antenna feeder No.1.
6. Install in the reverse order of removal.