FRONT CONSOLE REMOVAL/INSTALLATION
id091700601900
1. Disconnect the negative battery cable. (See NEGATIVE BATTERY CABLE DISCONNECTION/CONNECTION.)
2. Remove the following parts:
- (1) Center console tray (See CENTER CONSOLE TRAY REMOVAL/INSTALLATION.)
- (2) Shift bezel (See SHIFT BEZEL REMOVAL/INSTALLATION.)
- (3) Upper panel (See UPPER PANEL REMOVAL/INSTALLATION.)
- (4) Selector lever knob (ATX) (See AUTOMATIC TRANSAXLE SHIFT MECHANISM REMOVAL/INSTALLATION.)
- (5) Shift lever knob (MTX) (See MANUAL TRANSAXLE SHIFT MECHANISM REMOVAL/INSTALLATION [F65M-R].) (See MANUAL TRANSAXLE SHIFT MECHANISM REMOVAL/INSTALLATION [F66M-R].)
- (6) Shift panel (See SHIFT PANEL REMOVAL/INSTALLATION.)
- (7) Console side panel (See CONSOLE SIDE PANEL REMOVAL/INSTALLATION.)
- (8) Front console box (See FRONT CONSOLE BOX REMOVAL/INSTALLATION.)
- (9) CD player (with CD player) (See CD PLAYER REMOVAL.) (See CD PLAYER INSTALLATION.)
- (10) DVD/CD player (with DVD/CD player) (See DVD/CD PLAYER REMOVAL.) (See DVD/CD PLAYER INSTALLATION.)
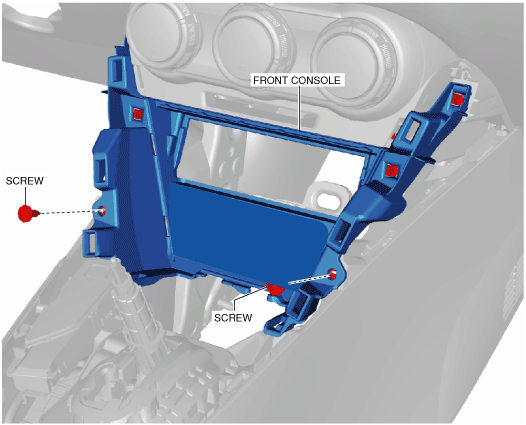
3. Remove the screws.
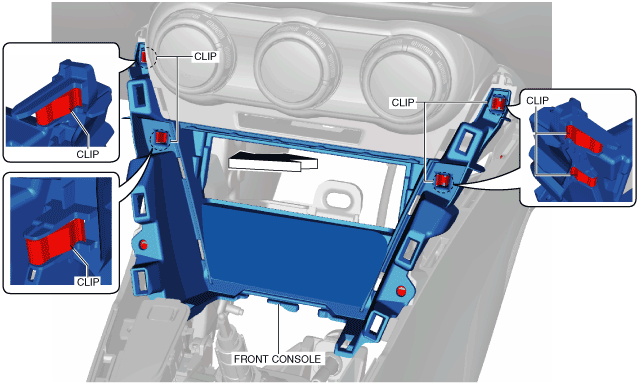
4. Remove the front console in the direction of arrow shown in the figure while detaching the clips.
5. Disconnect the auxiliary jack/USB port/SD card slot hub connector.(With center display)
6. Disconnect the connector of the auxiliary jack/USB port terminal.(Without center display)
7. Disconnect the accessory socket connector.
8. Install in the reverse order of removal.