 |
am2zzw00012254
KEYLESS ANTENNA REMOVAL/INSTALLATION
id091400514900
With Advanced Keyless Entry System
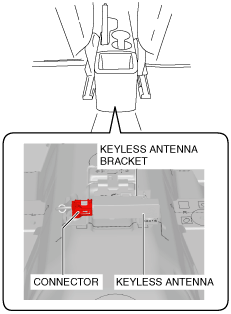
Vehicle interior, front
1. Disconnect the negative battery cable. (See NEGATIVE BATTERY CABLE DISCONNECTION/CONNECTION.)
2. Remove the glove compartment.(See GLOVE COMPARTMENT REMOVAL/INSTALLATION.)
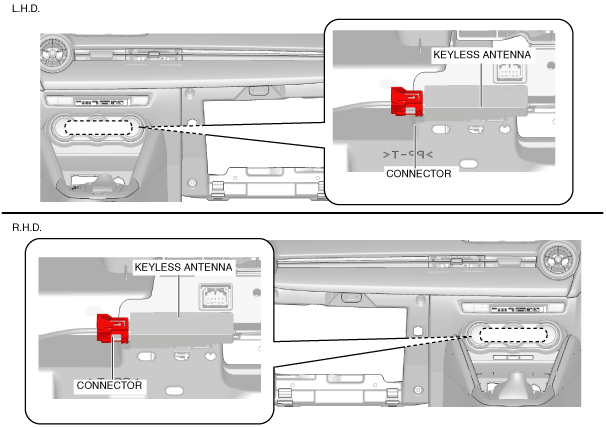
3. Disconnect the connector from the keyless antenna.
am2zzw00012254
|
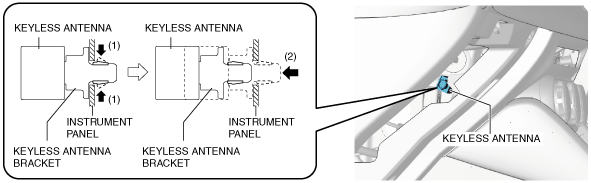
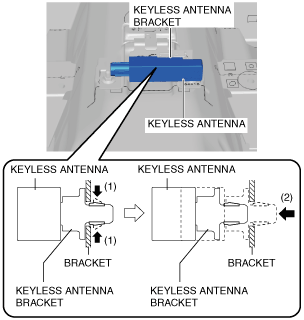
4. While pressing the keyless antenna bracket tab in the direction of arrow (1) shown in the figure, press it in the direction of arrow (2) to detach the keyless antenna bracket tab from the instrument panel.
am2zzw00012255
|
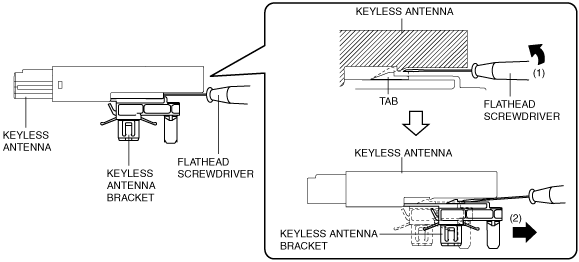
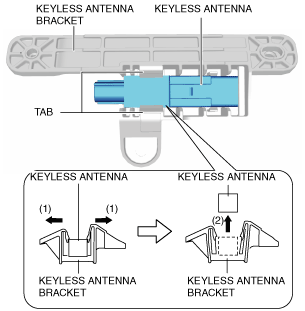
5. Insert a tape-wrapped flathead screwdriver into the position shown in the figure.
am2zzw00012256
|
6. Move the tape-wrapped flathead screwdriver in the direction of arrow (1) shown in the figure to press the keyless antenna bracket tab, and pull it in the direction of arrow (2) to detach the keyless antenna bracket from the keyless antenna.
7. Remove the keyless antenna bracket from the keyless antenna.
8. Install in the reverse order of removal.
Vehicle interior, rear
1. Disconnect the negative battery cable. (See NEGATIVE BATTERY CABLE DISCONNECTION/CONNECTION.)
2. Remove the rear seat cushion (See REAR SEAT CUSHION REMOVAL/INSTALLATION.)
3. Disconnect the connector from the keyless antenna.
am2zzw00012257
|
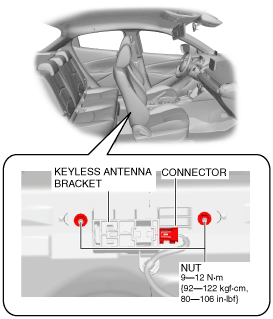
4. Remove the nuts from the keyless antenna bracket.
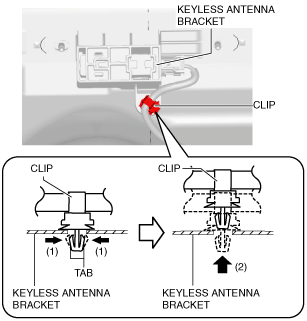
5. While pressing the clip tab in the directions of arrows (1) shown in the figure, press it in the direction of arrow (2) to detach the clip tab from the keyless antenna bracket.
am2zzw00012258
|
6. Remove the clip from the keyless antenna bracket.
7. While pressing the keyless antenna bracket tab in the directions of arrows (1) shown in the figure, pull the keyless antenna in the direction of arrow (2) to detach the keyless antenna bracket tab from the keyless antenna.
am2zzw00012259
|
8. Remove the keyless antenna from the keyless antenna bracket.
9. Install in the reverse order of removal.
Vehicle exterior, rear
1. Disconnect the negative battery cable. (See NEGATIVE BATTERY CABLE DISCONNECTION/CONNECTION.)
2. Remove the trunk floor cover. (See TRUNK FLOOR COVER REMOVAL/INSTALLATION.)
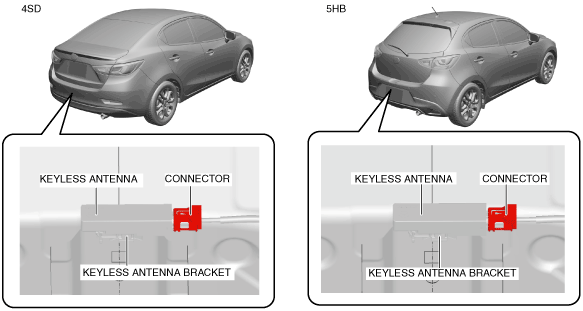
3. Disconnect the connector from the keyless antenna.
am2zzw00012260
|
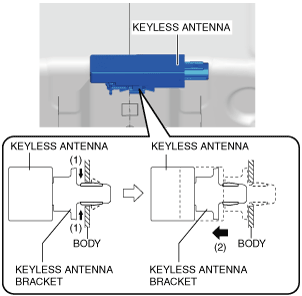
4. While pressing the keyless antenna bracket tab in the direction of arrow (1) shown in the figure, press it in the direction of arrow (2) to detach the keyless antenna bracket tab from the body.
am2zzw00012261
|
5. Remove the keyless antenna from the body.
6. Insert a tape-wrapped flathead screwdriver into the position shown in the figure.
am2zzw00012256
|
7. Move the tape-wrapped flathead screwdriver in the direction of arrow (1) shown in the figure to press the keyless antenna bracket tab, and pull it in the direction of arrow (2) to detach the keyless antenna bracket from the keyless antenna.
8. Remove the keyless antenna bracket from the keyless antenna.
9. Install in the reverse order of removal.
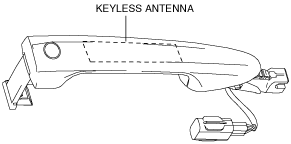
Vehicle exterior, driver's side/passenger's side
am3uuw00009944
|
With Keyless Entry System
Vehicle interior, center
1. Disconnect the negative battery cable. (See NEGATIVE BATTERY CABLE DISCONNECTION/CONNECTION.)
2. Remove the following parts:
3. Disconnect the connector from the keyless antenna.
am2zzw00012262
|
4. While pressing the keyless antenna bracket tab in the direction of arrow (1) shown in the figure, press it in the direction of arrow (2) to detach the keyless antenna bracket tab from the bracket.
am2zzw00012263
|
5. Remove the keyless antenna from the bracket.
6. Insert a tape-wrapped flathead screwdriver into the position shown in the figure.
am2zzw00012256
|
7. Move the tape-wrapped flathead screwdriver in the direction of arrow (1) shown in the figure to press the keyless antenna bracket tab, and pull it in the direction of arrow (2) to detach the keyless antenna bracket from the keyless antenna.
8. Remove the keyless antenna bracket from the keyless antenna.
9. Install in the reverse order of removal.